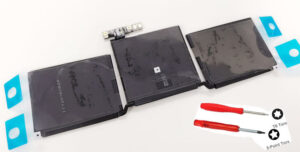
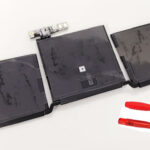
COMPATIBLE WITH: Models of 2013, 2014, 2015
How do you install an LCD assembly onto your Macbook Pro A1502? If you have been plagued by this question, then you have come to the right place. Here we have a complete guided tutorial for your convenience!
Install an LCD assembly onto your Macbook Pro in six steps;
Step 1: Loosen The Screen
Use a heat gun to loosen up the double-sided glue strip that holds the screen intact. Be cautious as if wrongly used, the heat gun can damage the LCD. Now place a strong suction cup on the glass and pull it out.
Once heated properly you’ll be able to see a tiny gap between the glass & the display. Insert a lean piece of plastic (i.e. credit card) into the opening. Now wiggle it enough where it can be slid right along the glass. Doing this will break the adhesive strip holding glass assembly. Repeat this step on the entirety of the screen of your Macbook Pro A1502.
Step 2: Remove The Screws
Once the screen becomes loose enough, now it is time to remove the four phillips head screws. You’ll have two on either side, holding the LCD to the frame, remove them and then remove the bottom two.
Step 3: Separate The Clutch Cover
After you have removed the four phillips screws, you now need to remove the clutch cover by sliding it to the side and applying a gentle upward pressure on your Macbook Pro A1502.
Step 4: Flip The Display
Now that the clutch cover is separated, it is time for you to flip the display assembly forward. This action will result in the LCD to come out free from the backing nice and easy.
Step 5: Gently Remove The LCD
Use extreme caution during this step, slowly and gently work the LVDS cable out of the opening of the display frame, this will allow you to remove the LCD from the display assembly of your Macbook Pro A1502.
Step 6: Resemble With New LCD
Now the arduous journey to remove the old LCD from your macbook pro is now over. Therefore we will now look towards resembling the macbook with the new LCD. To reassemble, place the new LCD back in the display frame, and insert the LVDS cable through the bottom opening in the display frame. Once it goes through, pull the cable from the otherside, you can use a plastic pry tool to help you direct the cable. Please use extreme caution, as the LVDS cable is very delicate and can be very easily damaged.
Align the bottom of the LCD with the bottom frame, and gently slide it into the groove of the bottom frame of your Macbook Pro A1502. After you’ve put the LCD in place, ensure that you screw the six holes by keeping them in proper alignment. You may also replace the six phillip head screws you had taken out from the previous assembly.


